Start .NET middleware from Scratch
Published by Oliver Heywood on March 10, 2021
This guide provides step-by-step instructions to stand up a hosted middleware API using a specific technology stack. It is intended for readers with a developer background, but who may not be familiar with these specific tools.
Microsoft Azure for cloud hosting,
.NET Core 3.1 for development framework
Ordercloud Dotnet Catalyst nuget package to accelerate Ordercloud-specific features.
This guide can also be found the github for dotnet-catalyst-examples.
Why do I need middleware?
Developers building OrderCloud ecommerce apps often use a server-side project for a variety of features. For example, secure integrations with 3rd parties like payment processors, scheduled jobs that sync data like product imports, custom event triggered emails, and others. Its almost certain your ecommerce solution will require middleware.
Setting up Accounts
Before beginning you will need an Ordercloud account and an Azure account. You should register for both before continuing. You will also need these free tools installed on your local machine - the .NET Framework, the .NET Core 3.1 runtime and Visual Studio 2019.
Get Code
Pull down starter code in the dotnet-catalyst-examples repository.
1git clone https://github.com/ordercloud-api/dotnet-catalyst-examples
Get this code into your own version control system.
Put app settings in Azure App Config
Your middleware API will need stored settings such as Ordercloud API Client credentials. We recommend storing them in Azure App Configuration. Then you can access one group of settings for hosted apps and local debugging. Follow these steps.
Create a new Azure resource of type App Configuration.
In the Configuration Explorer tab of the new resource, add your settings. Make sure the keys match the name of your fields in AppSettings.cs. Field nesting is represented with a colon. For example, the field
settings.OrderCloudSettings.ClientSecretwould have keyOrderCloudSettings:ClientSecret.Copy the connection string from your azure resource. This is found in the Access Keys tab.
Repeat these steps, starting with creating a new App Configuration resource in Azure, for each of your environments (e.g. Test, Stage, Prod).
Confirm API runs locally
Open the project in Visual Studio 2019 and add the connection string as an environment variable in a new debug profile. Do this by right clicking the WebApi project and go to Properties > Debug > New > Environment Variables. Use APP_CONFIG_CONNECTION as the key.
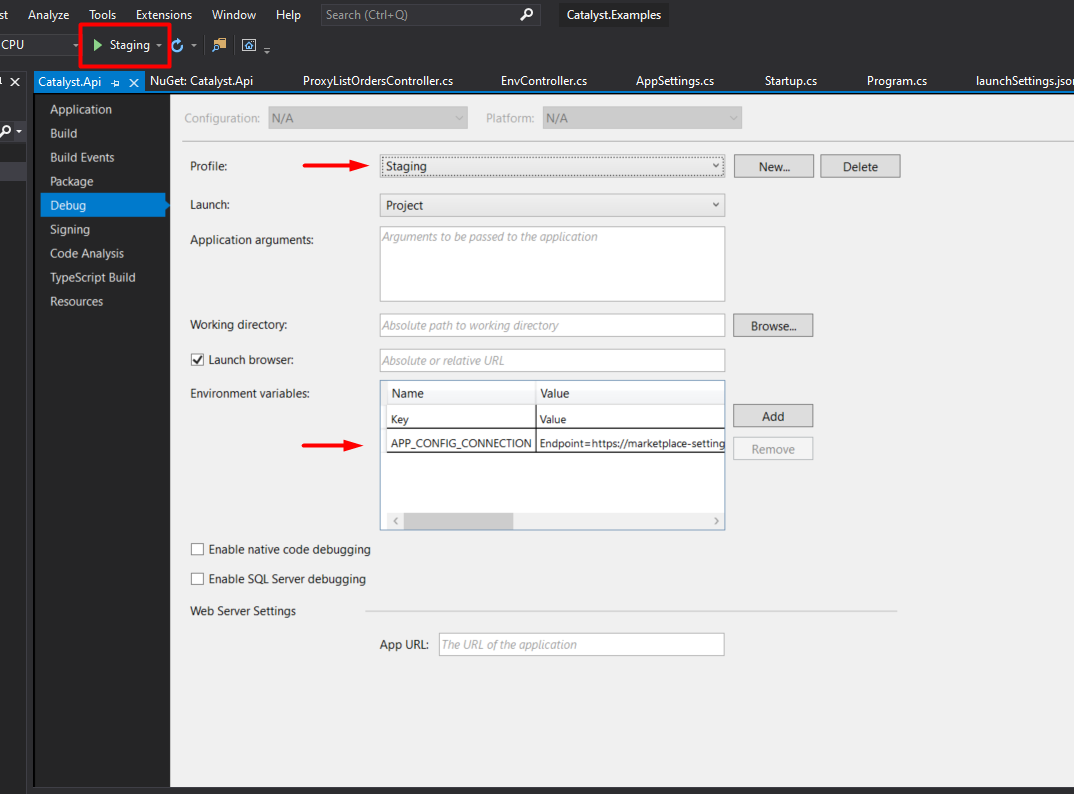
Add app settings locally in Visual Studio
In Visual Studio 2019, select the project Catalyst.Api, and select the new debug profile ("Staging" in the image) you created with the connection string. Click the green arrow.
https://localhost:5001 should pop up in your browser with route documentation for the starter API. Make a GET request to https://localhost:5001/api/env and you should see some of the settings you created in Azure.
Publish API to Azure App Service
You will need to create a new App Service resource in azure. Then add an app setting for APP_CONFIG_CONNECTION in the Configuration tab the same way you did locally in Visual Studio. Once that is done, you're ready to deploy code. Deploying is its own devops discipline. For the quick and dirty purpose of getting started you can deploy directly from Visual Studio. However, a CI/CD deployment tool like Azure Devops can greatly improve your deploy processes.
Azure Devops is our recommended approach. This project includes a azure-pipelines.yml config that specifies an Azure Devops build pipeline. For more info on these configs, see here. Modify line 8 of azure-pipelines.yml with your Azure App Service name and push that changes to the branch you want to deploy. Then, in Azure Devops create new build pipeline. Specify your git repository and Azure Devops should find deploy.yaml and handle the pipeline set up.
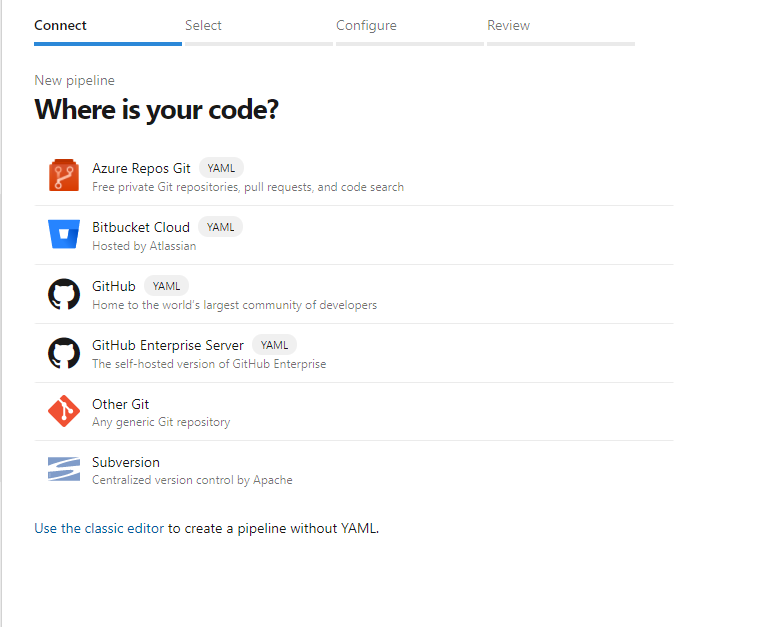
Point Azure devops to your code repository
After the pipeline has run and been released, you should have a working hosted API! Navigate to the url specified on the App Service overview tab to confirm. You should see the same behavior you saw locally.
Still have questions?
Ask in our Community Channel