Establishing API Access
Now that you have created your first marketplace and gained access to the API Console, you can begin the process of establishing API access for users within your marketplace. There are two main API resources relevant to establishing API access:
API Clients - API clients are access points to your marketplace data. These access points have properties that control what parties can use it, how they can gain access, and for how long that access remains valid.
Security Profiles - Security profiles are groups of roles (permissions), each of which grant users access to specific API endpoints and functionality. This lets you lock down access to your marketplace at the API level which is very powerful. If a request is made by a user without sufficient roles, they will receive a 403 Forbidden response.
Create a Shared API Client
Open up the API Console tab that has your Portal user context activated for our new marketplace. In the resources menu, click on Seller > API Clients. This should activate something we call an enhanced UI for managing API Clients. Essentially, this is a more user-friendly alternative to building up JSON requests in the API Console. Resources in the left-hand menu with a lightning bolt icon next to them all have their own Enhanced UI.
Click on CREATE NEW API CLIENT. You will be presented with a form that has quite a few settings available. Don't get overwhelmed by all of the options here, we will be configuring the simplest version of an API client to keep things light. If you want to read more about API clients in detail, you can read one of our more in-depth articles.
Choosing the right name for your API client is important. By picking something descriptive, future developers will better understand when they should be utilized. Let's call our new API client "Shared API Client" since it will be shared between all of the parties in our marketplace.
Jump down to Client Access Configuration and make the following changes:
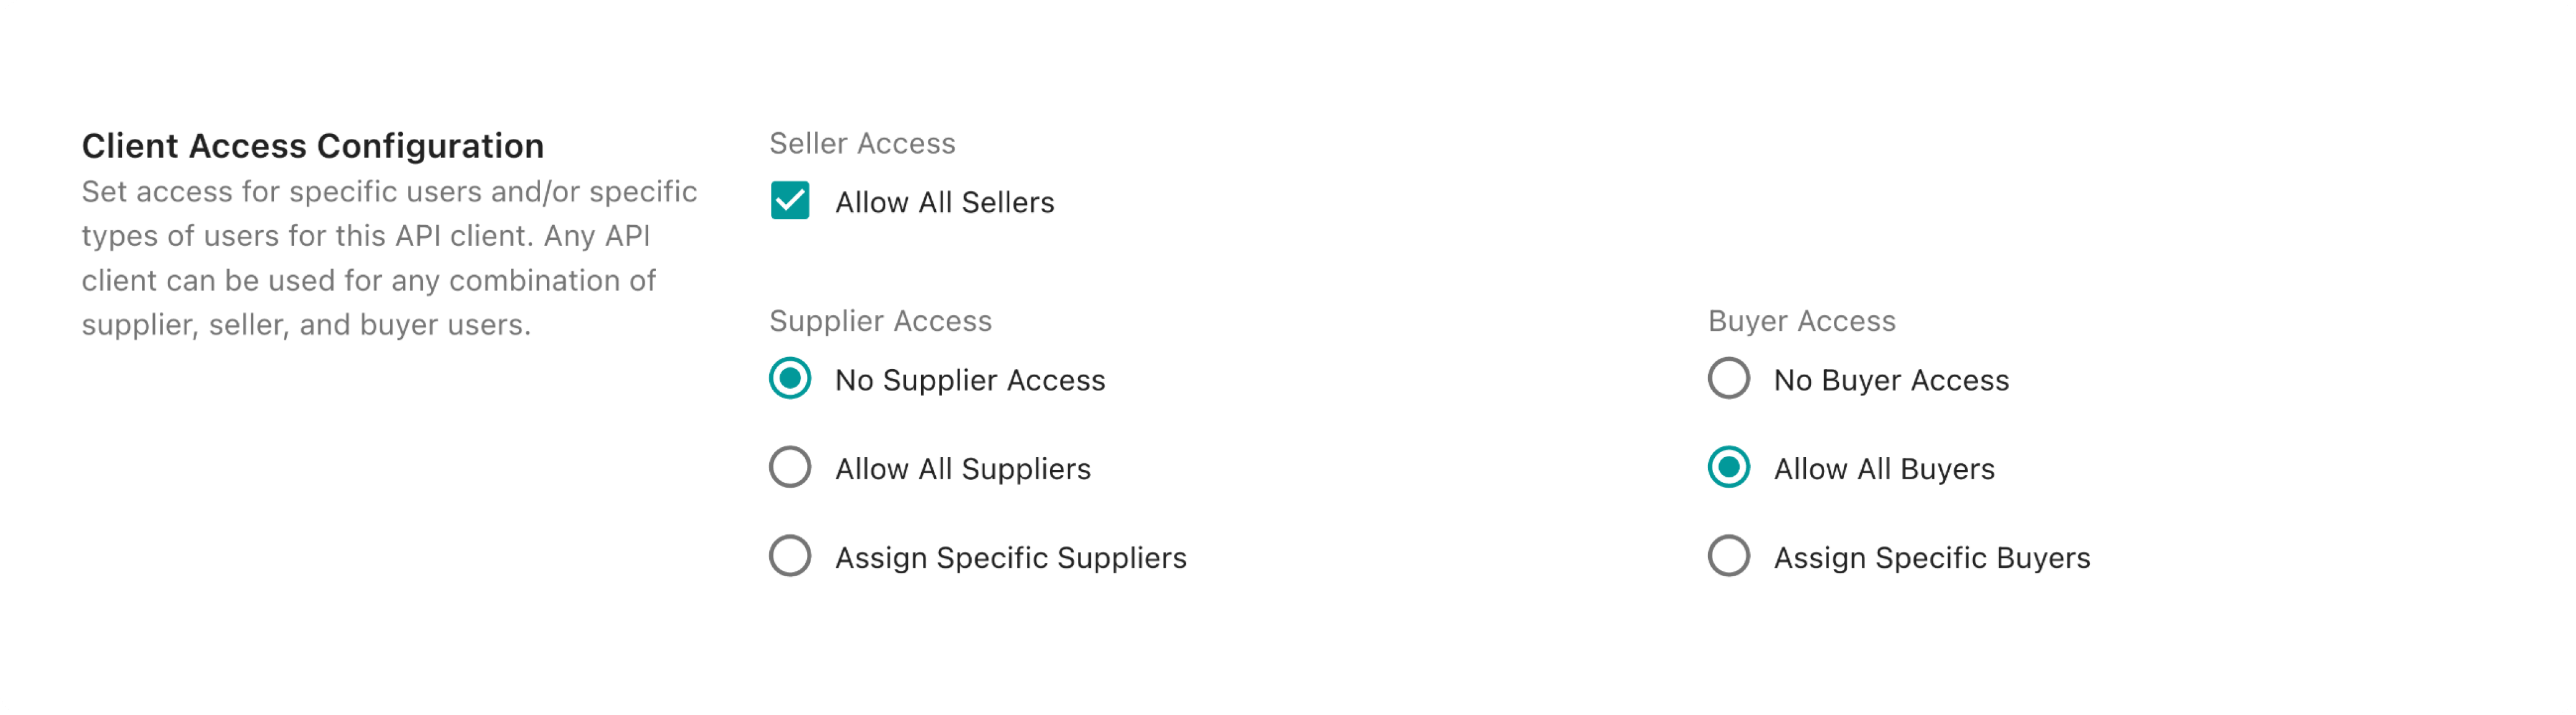
We are leaving supplier access turned off because we will not be diving into the concept of suppliers in this walkthrough. By selecting Allow All Sellers and Allow All Buyers we are saying that any admin user (seller) and any buyer user (shopper) can authenticate using this new API client. It's worth noting that this type of API configuration that allows both buyers and sellers is not very common. Usually buyers and sellers sign into completely different applications so it makes more sense to create a separate API client for each. We're creating a shared API client here for simplicity.
Submit the form by clicking CREATE NEW API CLIENT.
Create Your First Users
For the purposes of this walkthrough we will want to be able to access the OrderCloud API from both the seller and buyer perspectives. Creating your first buyer user will take a few more steps as we still have to establish a buyer organization.
Create an Admin User
In the left-hand resource menu select Seller > Admin Users and then in the operation selector where it says GET /adminusers click to select the "Create a new admin user" option.

This will pull up a form where you can either fill in each field individually, or paste in a JSON object of the entire request body. Copy and paste the following into the JSON field:
1{2 "ID": "ADMIN",3 "Username": "admin01",4 "Password": "xxxxxxxxxxxx",5 "FirstName": "Admin",6 "LastName": "User",7 "Email": "admin@email.com",8 "Active": true9}
A password must have minimum length 10 characters long and contain at least one digit, uppercase character and a lowercase character Replace Password with something you will remember and take note of it - you will need this later on.
Click SEND, you should see the API response appear on the right hand side.
Create Your First Buyer Organization and User
In the left-hand resource menu select Buyers > Buyers and then in the operation selector where it says GET /buyers click to select the "Create a new buyer" option.
As with the last request, copy and paste the following into the JSON field and click SEND:
1{2 "ID": "BUYER_ORGANIZATION",3 "Name": "Example Buyer",4 "Active": true5}
Next, select Buyers > Users and choose "Create a new user".
Notice that there is a new Parameters section above the request body fields. Since we are creating a buyer user, we need to tell OrderCloud which buyer organization to create the user in. Type in BUYER_ORGANIZATION as this was the ID we provided in the previous request.
Now copy and paste the following into the JSON field:
1{2 "ID": "BUYER_USER",3 "Username": "buyer01",4 "Password": "xxxxxxxxxxxx",5 "FirstName": "Buyer",6 "LastName": "User",7 "Email": "buyer@email.com",8 "Active": true9}
A password must have minimum length 10 characters long and contain at least one digit, uppercase character and a lowercase character Replace Password with something you will remember and take note of it - you will need this later on.
Click SEND.
Define and Assign Security Profiles
We now have two different users, one admin and one buyer. If it wasn't already apparent, we will be using the admin user to create our product catalogs and manage orders and our buyer user to shop product catalogs and submit orders. This means that we will want to limit each user's available API roles differently by creating and assigning security profiles.
Security Alert - It is considered bad practice to grant the FullAccess role to any Security Profile. Clever users with this role available to them can completely remove data essential to your OrderCloud solution by making direct API calls, even if they are not supported by your application.
Create two Security Profiles
Navigate to Authentication and Authorization > Security Profiles and choose "Create a new Security Profile" from the operation selector.
If you're viewing the enhanced UI click the lightning bolt icon on the left side of the toolbar to access the operation selector.

Create the following security profiles:
1{2 "ID": "ADMIN_PROFILE",3 "Name": "Admin User Profile",4 "Roles": [5 "MeAdmin",6 "PasswordReset",7 "BuyerReader",8 "OrderAdmin",9 "CatalogAdmin",10 "ProductAdmin",11 "ProductAssignmentAdmin",12 "PriceScheduleAdmin",13 "ShipmentAdmin"14 ]15}
1{2 "ID": "BUYER_PROFILE",3 "Name": "Buyer User Profile",4 "Roles": [5 "MeAdmin",6 "PasswordReset",7 "Shopper"8 ]9}
Security Profile Assignment
We now have two different users and two different profiles; however, we have not defined any sort of relationship between them. This is where assignments come into play. Staying in Authentication and Authorization > Security Profiles, choose "Create or update a security profile assignment" from the operation selector.
In general, it is a best practice to avoid assigning things directly to the user level, as this can result in cumbersome management experiences where every time a new user is created you have to create a new security profile assignment. Instead, let's assign the admin and buyer profiles to our seller and buyer organizations respectively.
To assign our Admin User Profile to the entire seller organization (which will only be inherited by the admin users), copy and paste the following into the request body JSON field and click "SEND":
1{2 "SecurityProfileID": "ADMIN_PROFILE"3}
Now when you get a list of admin users, you will see the Admin User Profile roles appear in the user's AvailableRoles field.
To assign our Buyer User Profile to the entire buyer organization, copy and paste the following into the JSON field and click "SEND":
1{2 "SecurityProfileID": "BUYER_PROFILE",3 "BuyerID": "BUYER_ORGANIZATION"4}
Similarly here, when you list buyer users under BUYER_ORGANIZATION, you will see the Buyer User Profile roles appear in the user's AvailableRoles field.
If we were to make additional assignments to other security profiles, you would see a union merge of all of the roles in any security profiles directly or indirectly assigned to each user in AvailableRoles.
Conclusion
We covered quite a lot in this guide. Let's review everything we did to establish API access for our Admin and Buyer users.
Created a shared API client that can be used by both sellers (admin users) and all buyers
Created our first admin user, buyer organization, and buyer user
Learned why not to use the
FullAccessAPI role and the risks involvedCreated an admin security profile with the roles needed for catalog/product/order management
Created a buyer security profile with the roles needed for a typical shopping experience
Understood why it is recommended to avoid user-specific assignments
Assigned our admin security profile to the seller organization
Assigned our buyer security profile to the buyer organization
Congratulations on getting this far - this is a huge step in understanding some of the most important concepts in OrderCloud.
Still have questions?
Ask in our Community Channel